PhotOMath Documentation
INSTALLATION
How to install PhotOMath Blogger Theme
You can Install our Blogger theme by following this tutorial - Install Blogger Premium Theme.
UPDATE CONTENTS
Logo Upload
Desktop Logo Upload:
- Blogger Dashboard ⇾ Layout
-
From Desktop/Laptop Logo Widget, click on Pencil ✎
Icon

-
The following instructions will guide you on how to upload your logo for desktop.

Recommended Image Size: 244 x 34 px
Recommended Image Type: .PNG or .png with transparent background
Mobile Logo Upload:
- Blogger Dashboard ⇾ Layout
-
From Mobile Logo Widget, click on Pencil ✎ Icon

-
The following instructions will guide you on how to upload your logo for mobile.

Recommended Image Size: 244 x 34 px or you can use 34 x 34 px
Recommended Image Type: .PNG or .png with transparent background
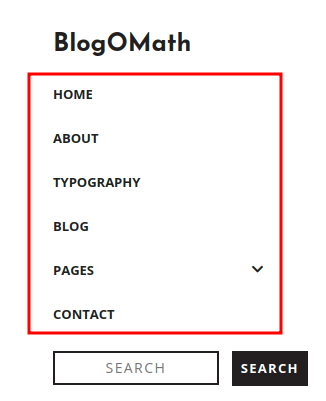
Primary Menu

- Blogger Dashboard ⇾ Layout
-
From Primary Menu Widget, click on Pencil ✎ Icon

-
Add A New Item

-
Site Name: Put item name
Site URL: Put item link
Dropdown Menu: Use single underscore (_) before the item name. Example: _dropdown
- Save
Secondary Menu

- Blogger Dashboard ⇾ Layout
-
From Secondary Menu Widget, click on Pencil ✎ Icon

-
Add A New Item

-
Site Name: Put item name
Site URL: Put item link
Note: No Dropdown Menu allowed.
- Save
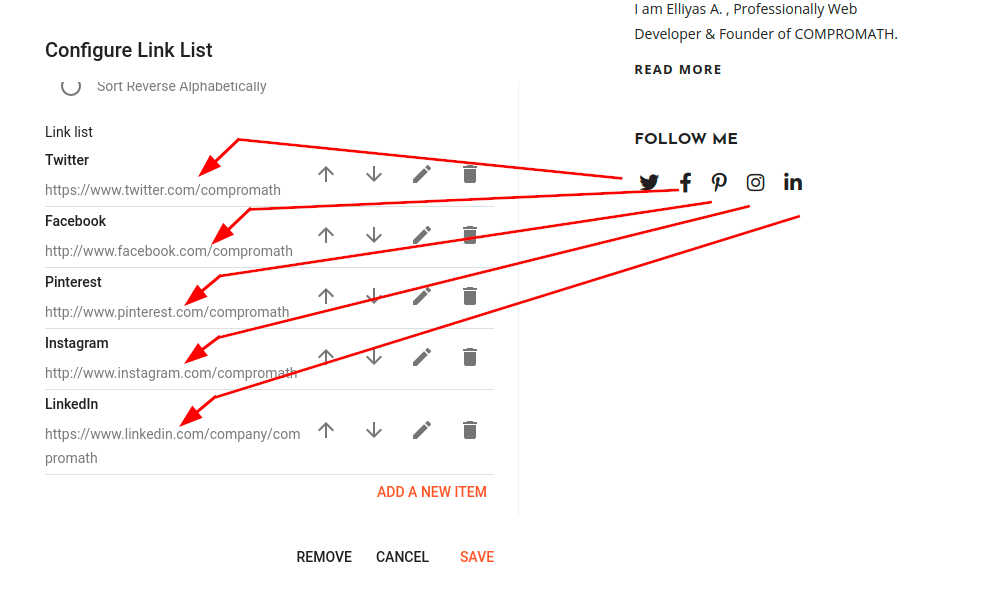
Social Icons
- Blogger Dashboard ⇾ Layout
- From Secondary Menu Widget, click on Pencil ✎ Icon And for About Widget (Right Sidebar) add a new LinkList widget and follow below.
-
Add A New Item

-
Site Name: Put text to show on hover the icon
Site URL: Social Link
Available Social Icons are: Apple, Deviantart, Dribbble, Email, Etsy, Facebook, Flickr, Foursquare, Github, Goodreads, Google, IMDB, Instagram, Linkedin, PayPal, Pinterest, Playstore, Ravelry, Reddit, RSS, Snapchat, Soundcloud, Spotify, Tumblr, Twitch, Twitter, Vimeo, Vine, YouTube
Note: Icon will be added automatically based on Social Links. Just put your social links.
- Save
Copyrights

-
Blogger Dashboard ⇾ Layout

-
From Copyright Text Widget, click on Pencil ✎ Icon.

- Put Copyright Contents and Save
Homepage Slider

By default, it displays the slider of thumbnail images for recent posts. You can display images from a specific category/label by following these steps:
- Blogger Dashboard ⇾ Layout
-
From Feature Label Widget, click on Pencil ✎ Icon.

- Put Label name (Example: Slide). Label name is Case Sensitive. Then Save.
-
You can hide this slider by turning it off from here (1).

How to get the Label name -
On the right side of every post you'll find the option to add a label/category. Example:
Please ensure that the Blog Post Feed and Allow Blog Feed settings are Full.

About Section [RIGHT SIDEBAR]
![About Section [RIGHT SIDEBAR] About Section [RIGHT SIDEBAR]](https://blogger.googleusercontent.com/img/b/R29vZ2xl/AVvXsEivkHdXBwbgS_bGfe6N6ZNfH2l2e9fYkPDm8ZhCVPOAqZ39a2m2MZB9y8Sg4I04fi5B54uzjUtd8j6lqb7O7RC5zV4d5yLCRVRLrsQSygR2Thox5f70kDO54MTis_VMaP-b2zV2QfIxCXk/s16000-rw/about+image.png)
We recommend that you use only Image and LinkList gadgets/widgets here. You can keep it if you need or use other ones.
How to update About Image
- Blogger Dashboard ⇾ Layout
-
From About Widget, add a new gadget Image and
follow below.

-
It is recommended to upload images with a 300px width. You will need a square image of 300x300px if you want to display a circle photo.

By default, it displays a rectangular image. To display circle/round photos, click here.
How to update About Social Link Image

- Blogger Dashboard ⇾ Layout
- From About Widget, add a new gadget LinkList.
- Add A New Item
-
Site Name: Put text to show on hover the icon
Site URL: Social Link
Available Social Icons are: Apple, Deviantart, Dribbble, Email, Etsy, Facebook, Flickr, Foursquare, Github, Goodreads, Google, IMDB, Instagram, Linkedin, PayPal, Pinterest, Playstore, Ravelry, Reddit, RSS, Snapchat, Soundcloud, Spotify, Tumblr, Twitch, Twitter, Vimeo, Vine, YouTube
- Save
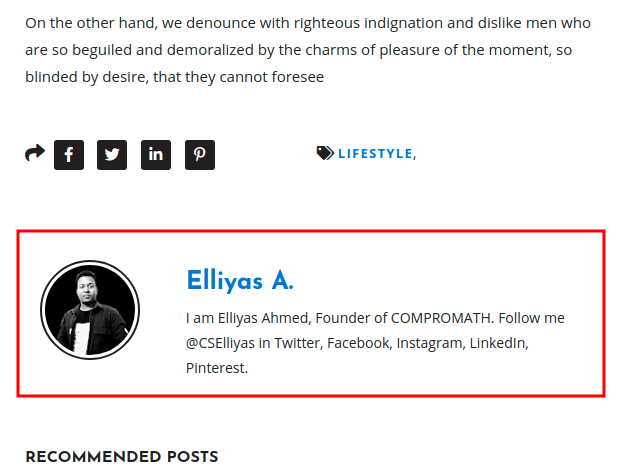
Article Author Profile

- Blogger Dashboard ⇾ Settings
-
Click User Profile and update the following
information

Go User Profile

Update Name, Profile Image

Update Short Bio
- Save
TWEAKS: COLOR AND TYPOGRAPHY
No coding knowledge is required to alter the color and typography of your blog. It is very easy from Blogger Dashboard ⇾ Theme ⇾ Customize option.
Background Colors
You can change the default background colors to your own. PhotOMath lets you customize the background color of Body, Main Wrapper, Left Sidebar and Right Sidebar (Only Widgets) section.
Change Body and Main Wrapper Background Color
-
Blogger Dashboard ⇾ Theme ⇾ Customize option.

-
Click on Advanced.

-
Next choose Background Color Settings and update to your
own colors.

- Save
Change Left Sidebar Background Color
- Access Theme Customize ⇾ Advanced option.
-
Next choose Left Sidebar Settings ⇾ Left Sidebar Background and update your colors.
- You can also update Text, Link colors of Left Sidebar section from here.
- Save
Change Right Sidebar Background Color
- Access Theme Customize ⇾ Advanced option.
- Next choose Right Sidebar Widget Settings ⇾ Widget Background and update your colors.
- You can also update Text, Link colors, font typography, title of Right Sidebar section from here.
- Save
Colors and Typography
Colors
Before changing any colors of your blog, we recommend to change the Primary and Secondary colors from Customize ⇾ Advanced ⇾ Theme Color Settings option. Because these colors are set as the default color of others.

Next change any colors for Body, Header, Menu, Sidebar (Both), Post Body, Comment, Popular Post, Featured Post, Buttons, Cookies etc from Customize ⇾ Advanced option.
Icon colors
You can change icon color and background color from Customize ⇾ Advanced ⇾ More Settings option. Here you can change several icon colors, read more box color, social share buttons color and background etc.
Typography
Before changing any fonts or typography of your blog, we recommend to change the basic font and typography from Customize ⇾ Advanced ⇾ Basic Font Settings option. Because these fonts are set as the default of others.

Next change any font and typography for Body, Header, Menu, Sidebar (Both), Post Body, Comment, Popular Post, Featured Post etc from Customize ⇾ Advanced option.
D: CONTROL SETTINGS
Change Width of Blog
By default, it is 1200px. If you want to expand your blog you can maximize it upto 1400px.
- Access Theme Customize ⇾ Advanced option.
-
Next choose Content Width Settings and update width.

- Save
Show or Hide Camera Icon
By default, the camera icon is shown when hovering over thumbnails. Follow the steps below to hide this icon.
- Access Theme Customize ⇾ Advanced option.
-
Next choose On/Off Settings ⇾ Camera Icon option. Change 1 to 0 value to turn off.
- Save
Switch Masonry or Grid Layout
You may choose either Masonry or Grid as a layout. You can do it by following the steps below.
- Access Theme Customize ⇾ Advanced option.
-
Next choose On/Off Settings ⇾ Masonry/Square Grid option. Here 1 for Masonry, 0 for Square Grid layout
- Save
Dark or Light or Day or Night Mode Setting
By default dark mode feature is active and that is why you see dark mode switch toggle at the top-right corner. It allows your visitor to choose the preferred mode. If you want to turn off this feature, then disable it by following below.
- Access Theme Customize ⇾ Advanced option.
-
Next choose On/Off Settings ⇾ Dark Mode option. Change 1 to 0 value to turn off.
- Save
Table of Contents (TOC) Setting
By default TOC feature is active. It generates and shows TOC automatically each post or page that contains major heading/heading/subheading/minor heading etc.
If you want to turn off this feature, then disable it by following below.
- Access Theme Customize ⇾ Advanced option.
- Next choose On/Off Settings ⇾ Table of Contents option. Change 1 to 0 value to turn off.
- Save
Round or Rectangle About Author Image Setting
By default Rectangle Size Image is active. If you want to make this image circle/round cropped, then do it by following below.
- Access Theme Customize ⇾ Advanced option.
- Next choose On/Off Settings ⇾ Round or Rectangle Image for Sidebar Author Box option. Change 0 to 1 value.
- Save
Show or Hide - Post Author Name and Post Date

By default it is active. If you want to turn off, then do it by following below.
- Access Theme Customize ⇾ Layout option.
-
From Post Wrapper Inner, click on Pencil ✎ Icon.

- Do the followings
- Save
Show or Hide - Post Share Buttons

By default it is active. If you want to turn off, then do it by following below.
- Access Theme Customize ⇾ Layout option.
- From Post Wrapper Inner, click on Pencil ✎ Icon.
-
Do the followings

- Save
Show or Hide - Post Author Profile Box

By default it is active. If you want to turn off, then do it by following below.
- Access Theme Customize ⇾ Layout option.
- From Post Wrapper Inner, click on Pencil ✎ Icon.
-
Do the followings

- Save
Change Related/Recommended Posts Title Name

Change this text by following below.
- Access Theme Customize ⇾ Layout option.
- From Post Wrapper Inner, click on Pencil ✎ Icon.
-
Do the followings

- Save
Change Read More Text

Change this text by following below.
- Access Theme Customize ⇾ Layout option.
- From Post Wrapper Inner, click on Pencil ✎ Icon.
-
Do the followings

- Save
Looking for assistance?
Our team will do all the customizing and theme installation for you if you do not have the time. Our services are top-notch. Please contact us.