How To Connect Namecheap Domain To Blogger
Getting a custom blog address like www.compromath.com instead of compromath.blogspot.com and setting it up your Google Blogger (BLOGSPOT) with Namecheap domain connection is going to be simple, even if you’re not an expert.
Follow the instructions (with screenshots) of this tutorial step-by-step.
Before Starting
(A) Make sure, why you need to buy domain and setup to your Blog or Website –
- Brand Value.
- Removing .blogspot subdomain from your blog address
- Blogging professionally.
(B) Make sure, Why you shouldn’t use free custom domain with .tk , .ml or other domain extension –
- These domains aren’t permanent.
- They aren’t secure and safe.
(C) Make sure, Why you DON’T need to buy SSL for Blogger –
- Blogger provides FREE SSL with any Domain Name.
- Purchasing additional SSL conflicts domain setup
Where to purchase Domain Name for Blogger
You can purchase your preferred domain name from any domain providers that provide full control panel to update settings of DNS Records, A-Records, CNAME etc.
Here are some recommended providers –
- NameCheap [I will use this for showing how to setup]
- Google Domain
- GoDaddy
Why NameCheap is recommended for Blogger
I have connected a lot of domain for my owns and clients and I have found NameCheap is the best for connecting, managing domains for Blogger and other CMS as well as.
How to Register Domain to NameCheap for Blogger
To register your custom domain to connect to your Blogger/BLOGSPOT blog, just continue the following steps.
- Go to NameCheap .
- Search Domain Availability.
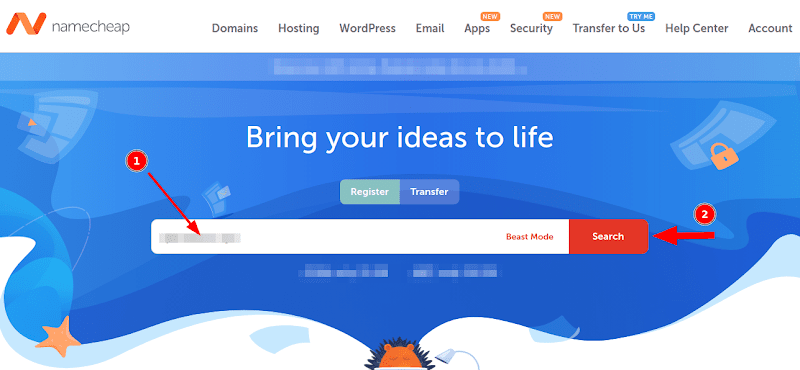 Because all of the domain names aren’t available. Someone like you may have already purchased. Therefore, do not panic if you cannot find your desired domain name. You can twist with alphabets or anything else.
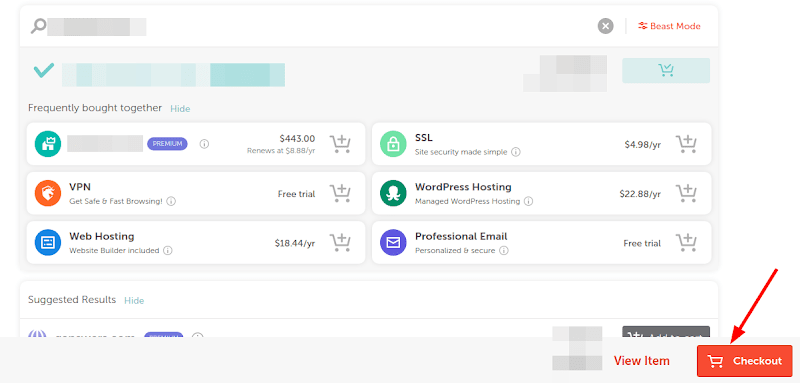
 - Select Available Domain and Add to Cart.
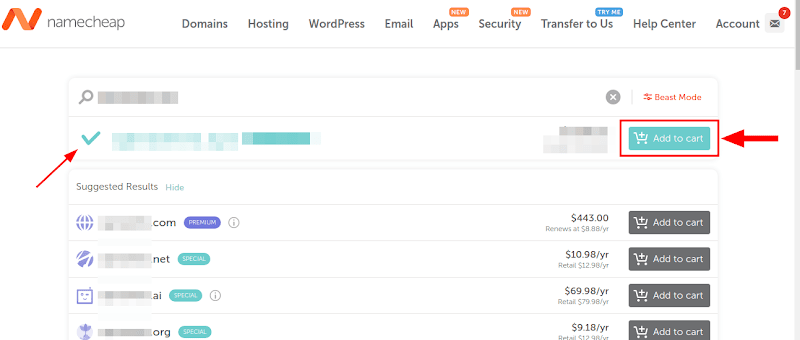
- Checkout
- Make Payment to Confirm Order.
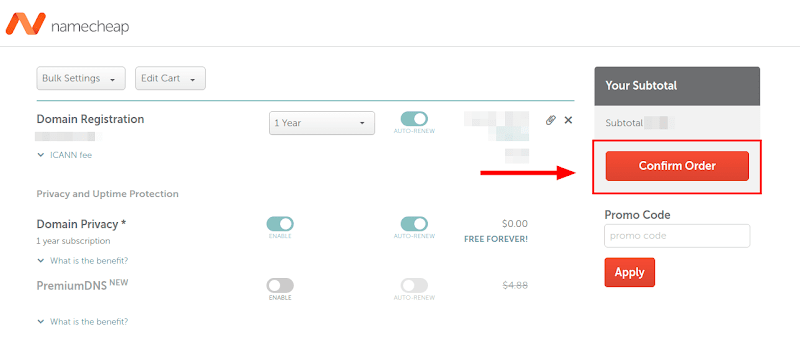 If you don’t have any NameCheap account, you need to create to confirm order. And you will get receipt of your order in your email.
How to Connect Registered Domain to Blogger
It is simple. Here are 11 Steps to connect any custom domain to Blogger Blog or Website.
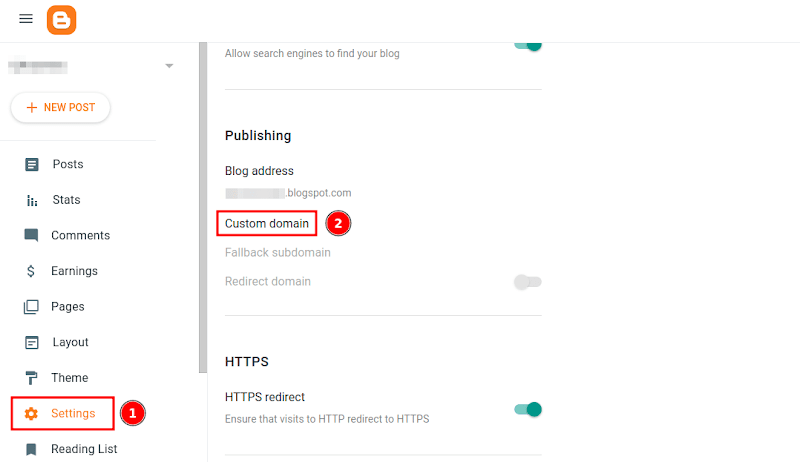
- Go to Blogger Dashboard ⇾ Settings
- Scroll Down to Publishing and select Custom Domain.
- Put your domain name (with
www) and Click on Save. Blogger doesn’t allow custom domain withoutwwwin this setting. But you can redirect your domain withoutwwwto withwwwlater in this settings (I will show).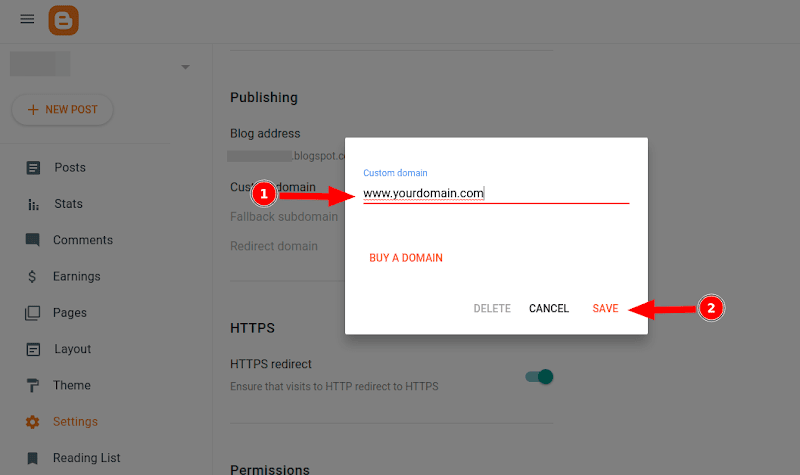
- You will see a box will appeared with some warnings.
We have not been able to verify your authority to this domain. On your domain registrar's website, locate your Domain Name System (DNS) settings and enter the following two CNAMEs: (Name: www, Destination: ghs.google.com) and (Name: xxxxxxx, Destination: gv-xxxxxxx.dv.googlehosted.com). See https://support.google.com/blogger/answer/1233387 for detailed instructions.
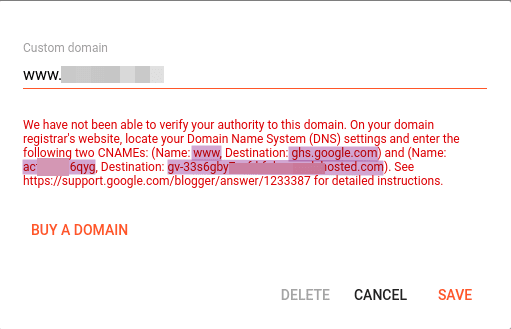
SL. Name Destination 1. www xxxxxxx 2. ghs.google.com gv-xxxxxxx.dv.googlehosted.com
Here we need marked information to save and will use in Namecheap Advanced DNS settings. - Don’t try to save now. Keep it as it now and continue the next step.
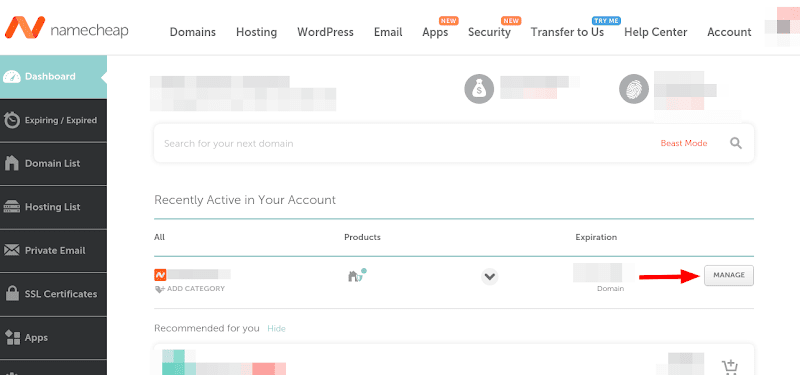
- Now, Go to NameCheap Dashboard and you will get a dashboard like this. Click on Manage.
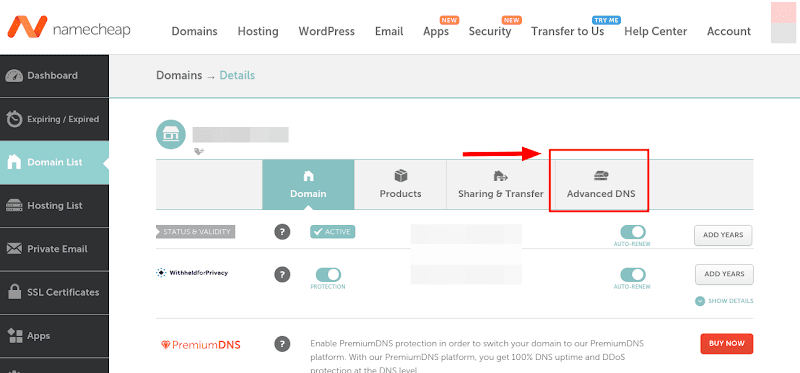
- Click on Advanced DNS.
- Perform 1 & 2 tasks and click on ADD NEW RECORD.
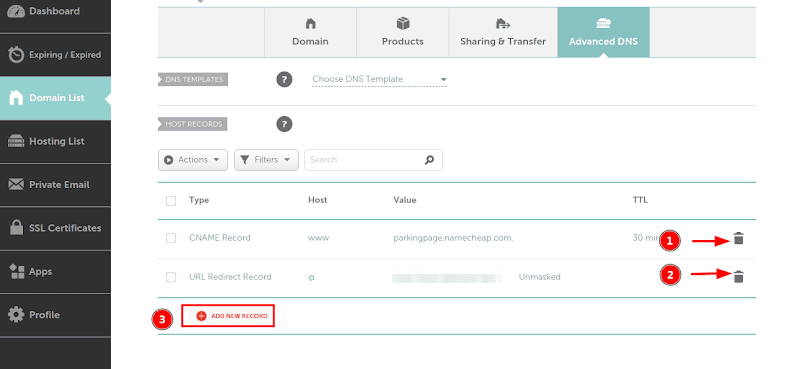
- Add the following CNAME, A Records one-by-one and Save All Changes.
SL. Type Host Value TTL 1. CNAME www ghs.google.com 1 min 2. CNAME xxxxxxx gv-xxxxxxx.dv.googlehosted.com 1 min 3. A Record @ 216.239.32.21 1 min 4. A Record @ 216.239.34.21 1 min 5. A Record @ 216.239.36.21 1 min 6. A Record @ 216.239.38.21 1 min
Note: Update the red-marked value with yours.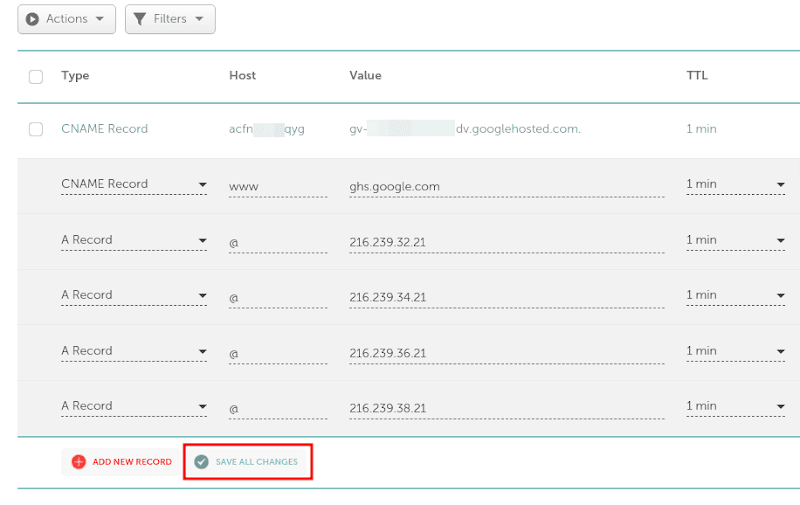
- Wait 2/3 minutes. Then go to Blogger Dashboard Tab from your browser and Click on Save now.
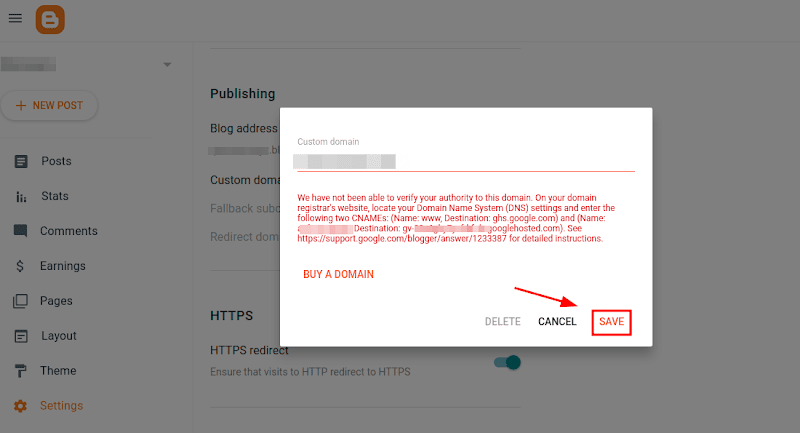 It will either save or show warnings not to save but don’t panic. Try again after few minutes. You don’t need to change any settings.
 - After Saving, enable these features one-by-one. Redirect Domain
HTTPS Availability
HTTPS Redirect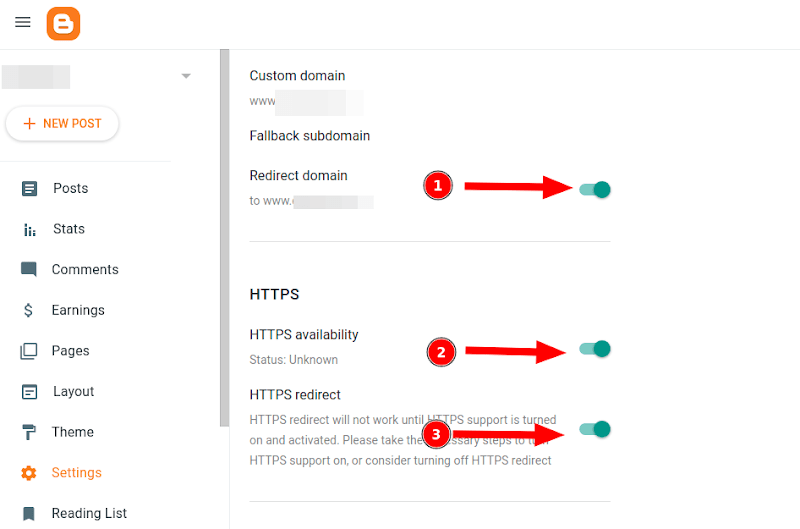 It will take few minutes to hours to update and activate your added custom domain. In this time if you try to visit your new domain, you may see browser errors like below –
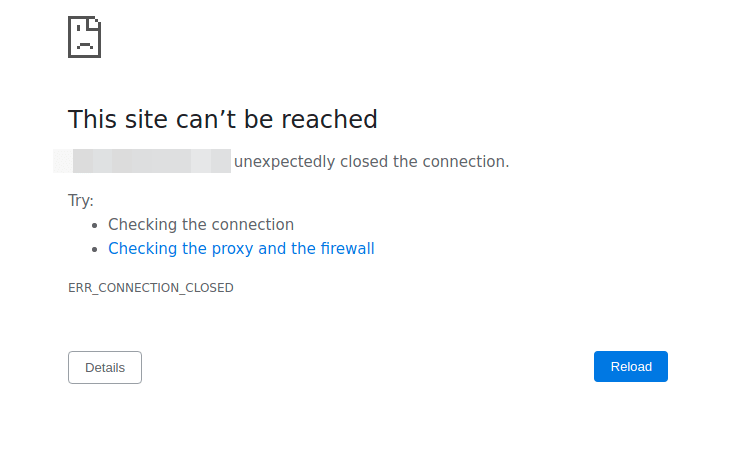
Don’t panic. You don’t need to do anything. Just wait. It will automatically connect your domain successfully.
# Written by Elliyas Ahmed


